1. Turn off the power to your doorbell at the circuit breaker
TIP: To locate the right switch, try turning each switch off, one at a time and seeing if your doorbell rings.
2. Remove your existing doorbell
Unscrew the doorbell, then unhook the wires from the back of the doorbell by loosening the screws that hold the wire ends. Make sure the wires don’t fall back into the wall
TIP: Wrap the wires around a pencil or use tape to prevent them from falling back into the wall
3. Thread the doorbell wires through the center of the mounting bracket
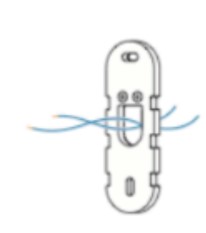
- To connect the angle of your doorball with the included angled base go to Optional Install B .
- To install on a stone, brick, or stucco surface, go to Optional Install C.
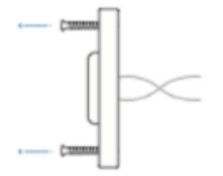
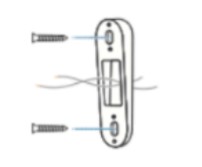
4. Screw the mounting bracket to the wall
Use the 2 included 1′ screws to install the mounting bracket
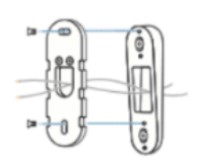
5. Connect the wires to the mounting bracket
a. Loosen terminal screw
b. Slide exposed wire behind the square washers and around each screw (wines can connect to either screw)
c. Tighten screws to secure wire
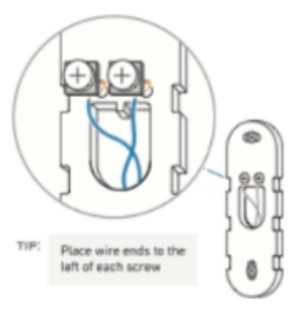
Tip: Place wire ends to the left of each screw
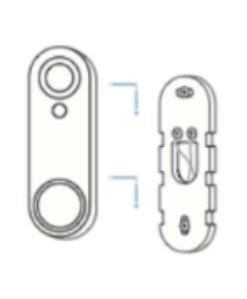
6. Slide your doorbell into place
Push doorbell on to mounting bracket and slide down until it clicks.
7. Turn on the power to your doorbell at the circuit breaker
8. Press the doorbell to test chime connection
Did your doorbell chime ? If yes, it’s Working! If not, check that wires are Secure.
Note: Camera battery may need air minute to charge before the camera can be connected to the WiFi, LED ring will blink white after button press when camera
9. Now it’s time to setup your wifi
Open the SimpleSafe app on your mobile device and navigate to “set up mySimplicam” to Finish installing
Scan this QR code to download the Simal Salep
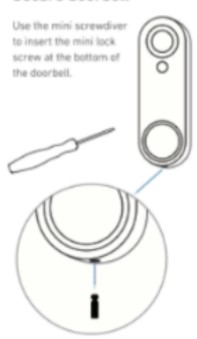
OPTIONAL INSTALL A
Secure doorbell
Use the mini screw driver to insert the mini lock screw at the bottom the doorbell.
OPTIONAL INSTALL B
Installing with the angled base
The included angled straightens a doorbell placed a slanted surface such as siding or shingles, or may be used to adjust the angle of the camera up or down.
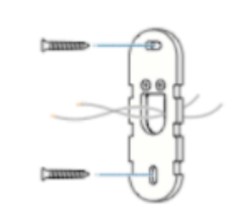
First, screw the Angled Base to the wall.
Place the angled base with the smooth side to the wall. Thread doorbell wires through the center opening, then screw the bracket to the wall using the 1″ screws.
These attach the Mounting Bracket on top
Screw mounting bracket onto angle bracket using the two small angle-bracket screws.
Return to step 5 to continue install.
OPTIONAL INSTALL C
Installing on stone, brick, or stucco surfaces
First mark the hole location
Mark the wall first with a pencil using the mounting bracket holers as a template.
Then drill hole and install anchors
Drill hole at each pencil mark with 3/16 1.47mmonry bit. Insert will anchors into the holes by gently tapping with a hammer or mallet.
Return to step 5 to continue install.
Need help? Call 1-88-957-265T
Need help? Call 1-888-957-6657
You can download the PF version of SS VIDEO DOORBELL PRO Installation Guide here.